Desk Cable Management: 7 Practical Ways to Hide Wires
Let me be honest with you: I spent the first year of working from home with a literal mess of cables under my desk. Ethernet, monitor cable, keyboard, mouse, charger, headphone wire — it looked like a tangle of spaghetti that had been fed through a blender. I told myself I'd fix it "this weekend" for about eleven months straight.
When I finally did, it took about an hour and cost me less than $30. And I kicked myself for not doing it sooner. Here's exactly what I did.
1. Start With a Cable Audit
This sounds more official than it is. Just pull your desk out from the wall and look at what's actually plugged in. You'll probably find at least two cables you don't even use anymore — that old phone charger, the USB cable for a device you sold two years ago. Unplug them. Throw them away or put them in a drawer. Half the battle is just reducing the number of cables before you try to organize them.
I found three cables I didn't need. That's three fewer things to manage.
2. Velcro Straps Over Zip Ties, Every Time
Zip ties are tempting because they're cheap and they look clean. But here's the problem: every time you need to add or remove a cable, you have to cut the zip tie and replace it. Velcro straps cost about the same, take the same amount of time to put on, and you can reuse them forever.
Bundle cables that run in the same direction together. Don't bundle power cables with data cables if you can avoid it — it's better for signal quality, and it makes troubleshooting way easier.
3. The Under-Desk Tray Is Non-Negotiable
This was the single biggest change in my setup. An under-desk cable management tray is basically a metal shelf that screws into the underside of your desk. You put your power strip and excess cable length in there, and the tray hides everything from view.
I got mine for $9 on Amazon. It took five minutes to install with four screws. That's it. Suddenly, looking at my desk from the front, there were zero visible cables. It felt like magic, but it's just a $9 piece of metal. You can find this exact item in our Budget Desk Upgrade scheme.
Pro tip: When mounting the tray, position it so the power strip inside is still reachable from your seat. You don't want to crawl under the desk every time you need to reset a router or plug in a USB charger.
4. Route Cables Along the Desk Legs
This is the trick that makes everything look professional. Instead of letting cables hang straight down from the back of your desk (which is visible from the front), use adhesive cable clips (the little plastic ones with a sticky back) to route cables along the desk legs before they drop to the floor.
From across the room, the cables just disappear into the desk leg. It makes a huge difference, especially if your desk is in a visible part of the room.
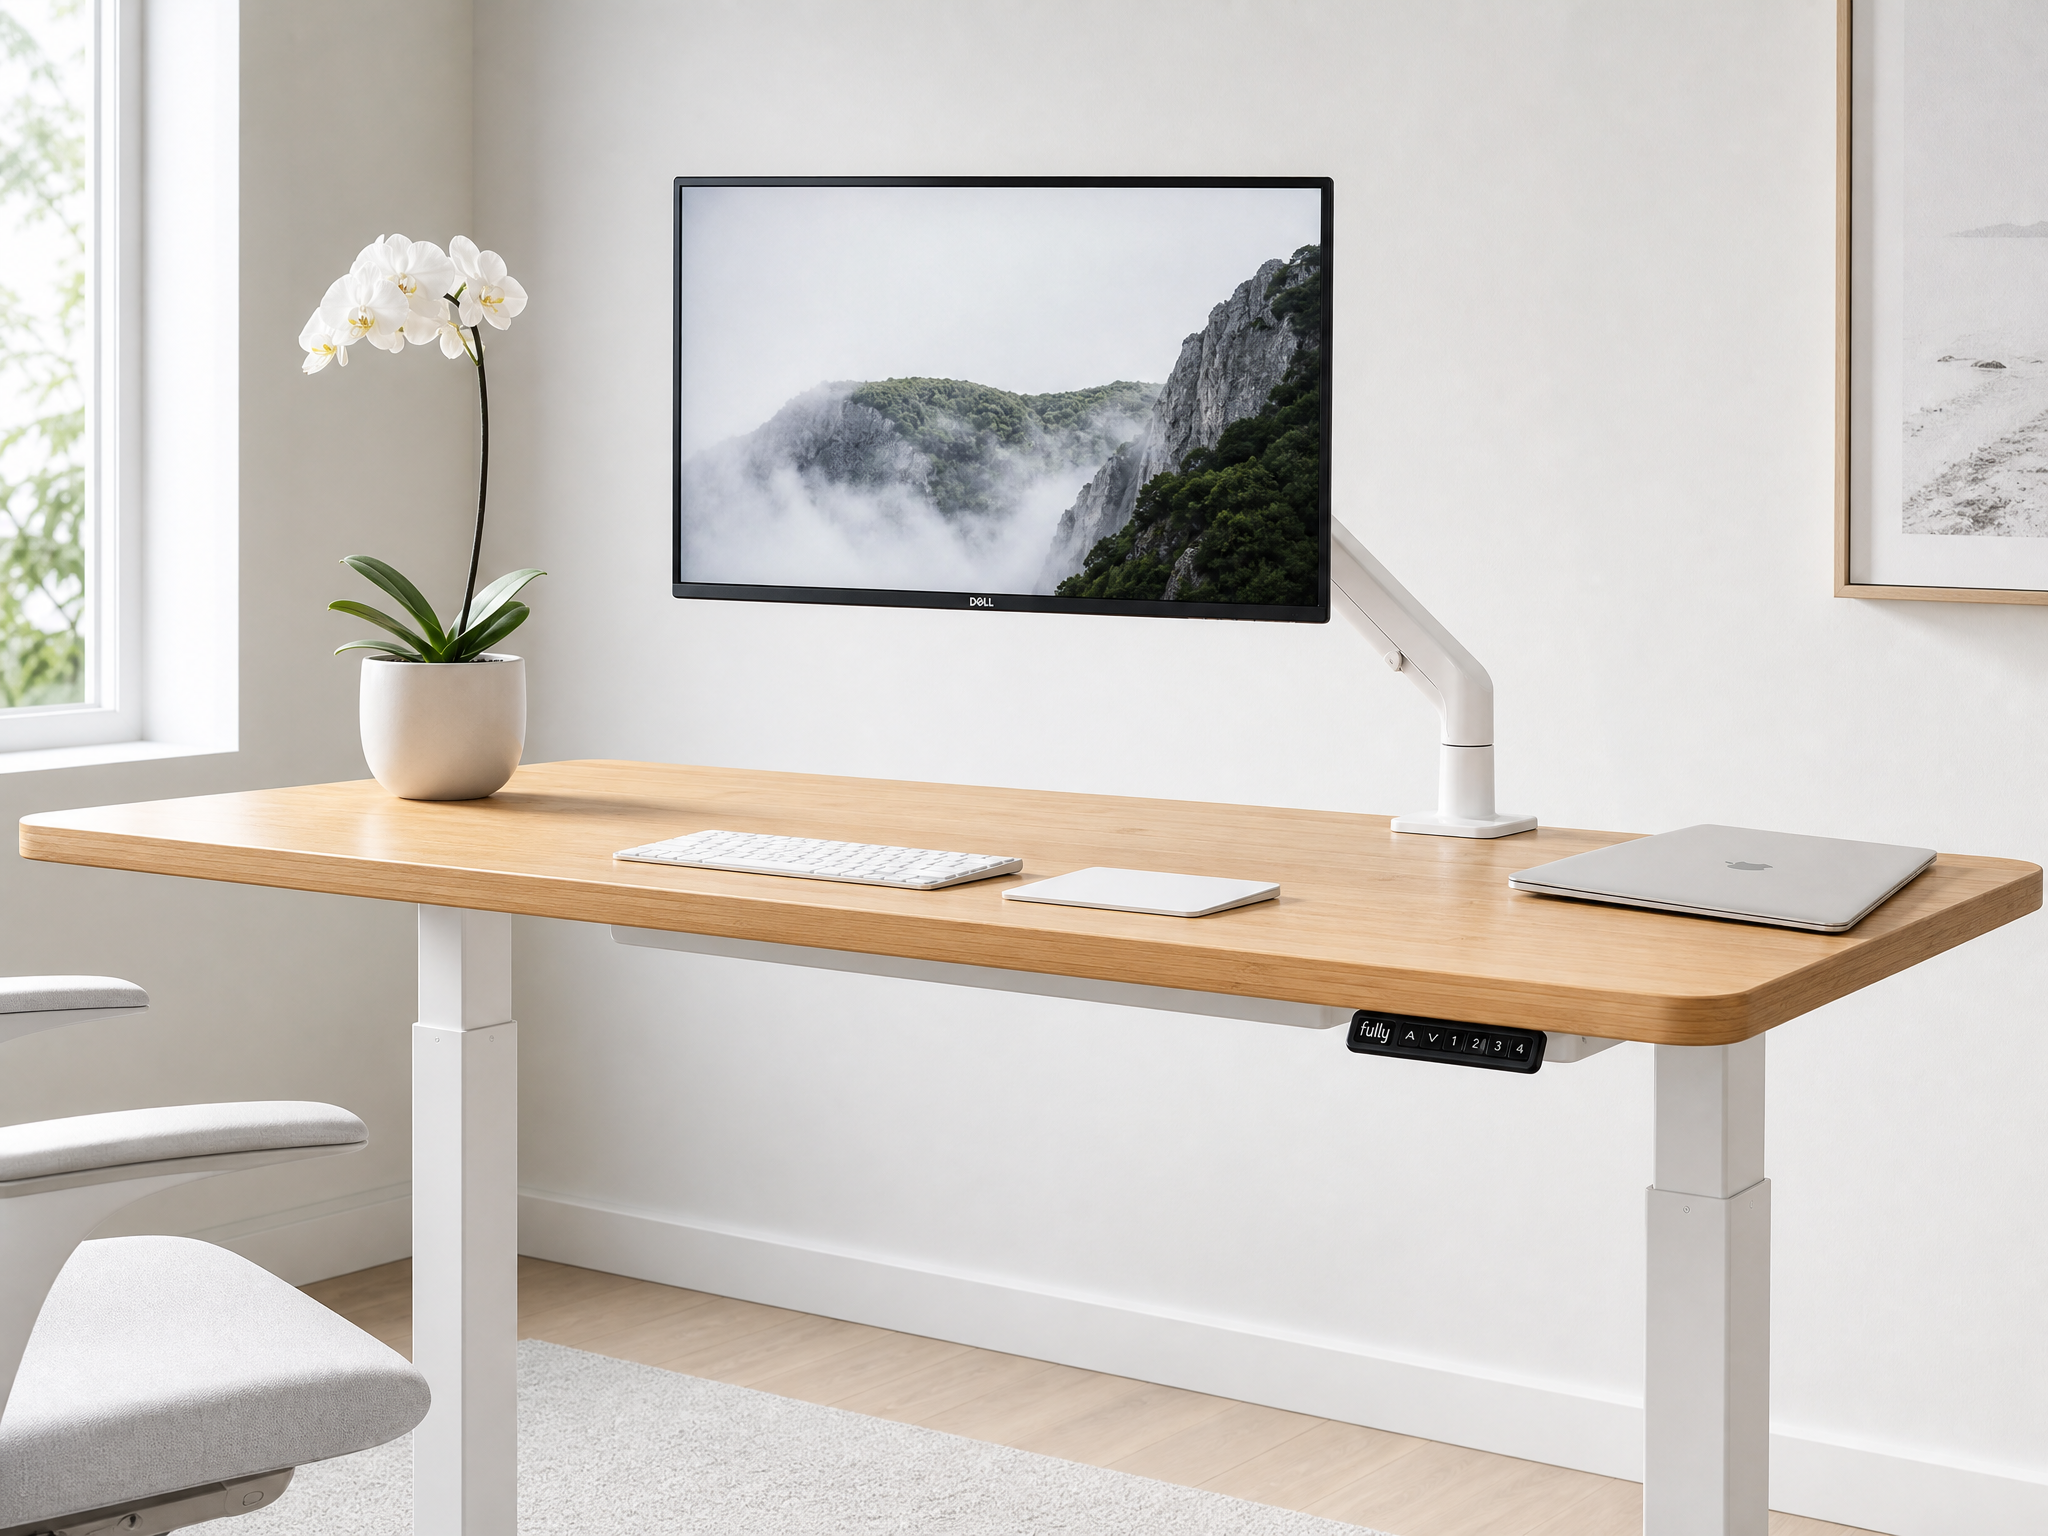
5. Use the Monitor Arm's Built-In Channel
Most monitor arms have a plastic channel or clip system built into the arm itself. Use it. Run your monitor power cable and video cable inside the arm channel, and they'll be almost completely invisible. This alone removes two of the most visible cables from your desk surface.
I talked about this more in my budget minimalist desk guide, but a good monitor arm is one of the best cable management tools you can buy.
Quick math: Between the under-desk tray ($9), velcro straps ($5), and adhesive clips ($4), I spent about $18 to solve a problem that annoyed me every single day for a year. That's less than the cost of two coffees. Just do it.
6. Go Wireless Where It Actually Matters
I'm not going to tell you to go fully wireless — wired peripherals are cheaper, more reliable, and don't need charging. But there are two things where wireless makes a real difference for cable management: mouse and keyboard.
Those two cables alone cross your entire desk surface. A basic wireless keyboard and mouse combo removes both of them. You don't need the expensive gaming versions — a simple Logitech combo for $30–$40 does the job perfectly. The AA batteries last months.
7. Label Your Charger Ends
This is the simplest tip in the list and the one I wish I'd done years ago. Put a small piece of masking tape (or a label maker if you're fancy) on the end of each charger cable saying what it's for. "Laptop." "Monitor." "Keyboard." "Phone."
It takes ten minutes once, and it saves you so much frustration every time you unplug something to move your desk or travel. Plus, labeled cables just look more intentional than a bundle of identical white wires.
The Gold Standard: Zero Visible Cables
If you want to see what a truly cable-free setup looks like, check out our Wireless Clean Setup scheme. It's pricier — about $2,847 for the full build — but honestly, you can get 90% of the look with the $18 in cable management tools I mentioned above.
The difference between a "good" desk setup and a "great" one is usually just cable management. Everything else is negotiable. Your desk can be an IKEA basic. Your chair can be a hand-me-down. But if your cables are clean, the whole setup looks intentional.
And if you're building from scratch and want to see how a full minimalist desk comes together, our Minimalist Designer Desk scheme has the full product list with links.
Explore more desk setups: Wireless Clean Setup
Explore more desk setups: Budget Desk Upgrade